

Somewhere around the third time you type your venue's address into a text message, you start wondering if there is a better way. There is. A wedding website is one address, one page, that holds everything a guest needs: who you are, where to be, when, and how to say they are coming. Send it once, and the questions mostly stop.
This guide walks the whole thing end to end: opening the builder, telling your story, introducing yourselves, answering the questions guests always ask, choosing how it looks, deciding who can see it, and finally, what it looks like once it is live. It takes about twenty minutes, most of which is just deciding what to say.
One honest note before you start: building and previewing your site is free. Publishing it, so guests can actually open the address, is included from the Essential plan up. Upgrading is a one-time purchase for your event, priced in euros with VAT included at checkout, not a subscription you have to remember to cancel.
The short version
- Every event gets a private builder with a live preview beside it, desktop and mobile.
- You fill in real sections, your story, your people, the venue, and FAQs, and turn each on or off.
- Choose an accent colour and a hero photo so the site looks like yours, not a template.
- Lock it with a password so only the guests you send the link to can open it.
- When you are ready, flip it live and share the one address everywhere.
Before you start: create your event
If you have not made your event yet, do that first, it takes a minute. Give it a name, usually your names, choose the kind of celebration, and set the date. Everything below, the website, your guest list, your invitations, hangs off that one event.
Step 1: Open the builder
From your event, open Website. You land in the studio: a list of sections on the left, and a live preview of your actual site on the right, updating as you work. A section is simply one block of your page, your story, your people, the venue, and so on, and you can turn each one on or off, reorder them, or edit what is inside.
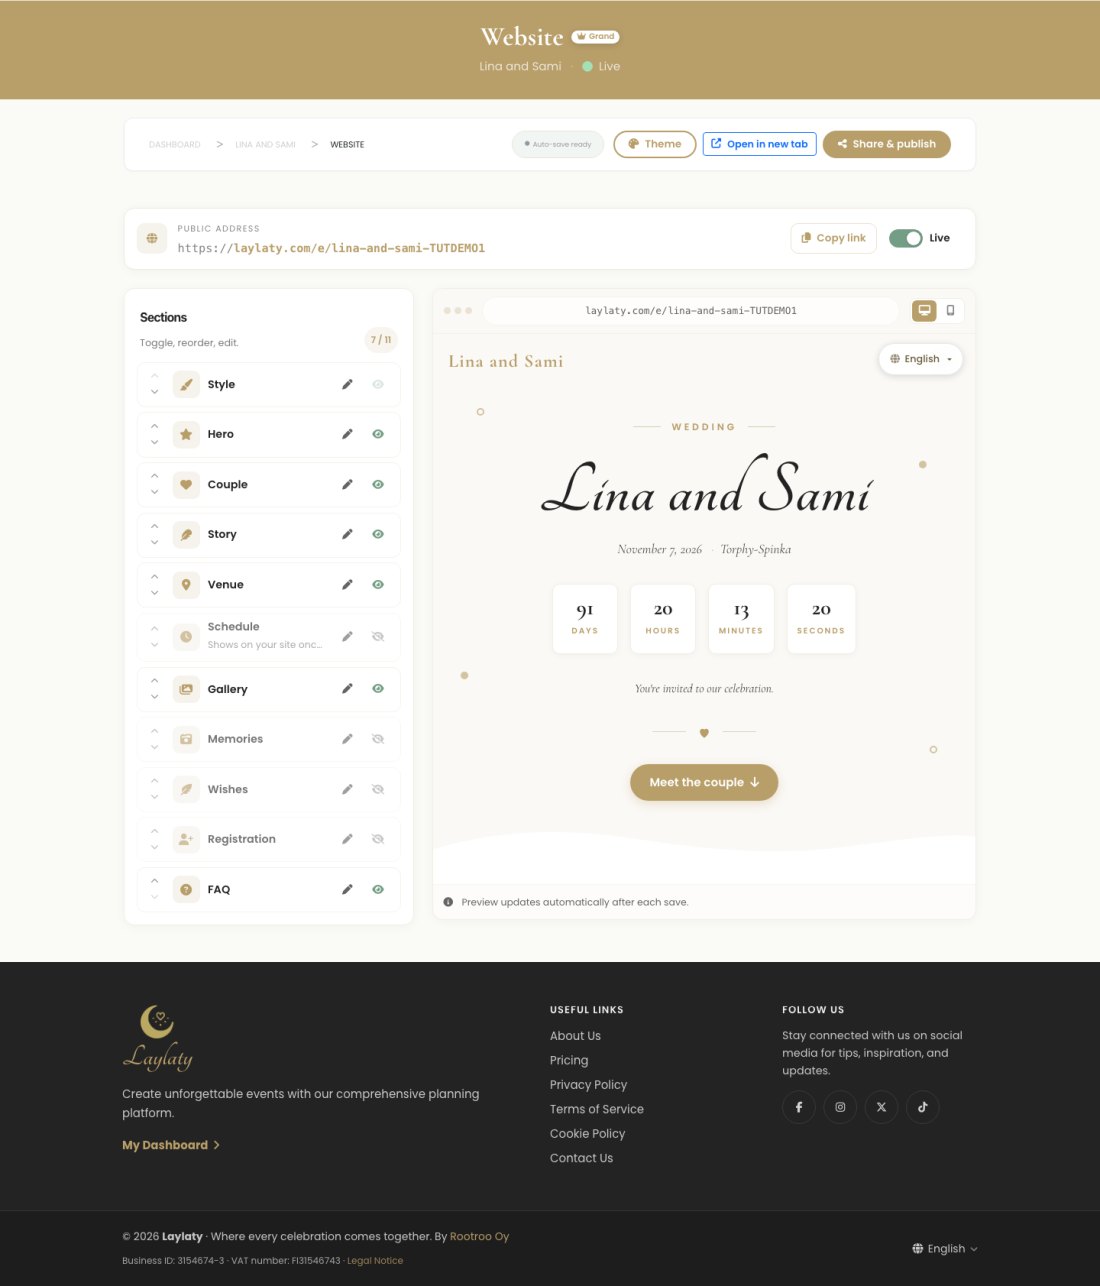
The preview has a desktop and a mobile view, the two little icons above it, so you can check both without leaving the page. Most couples build the whole site in one sitting, then come back and polish it over the following weeks.
Tip
Start with the sections that answer real questions, the venue and the FAQs, before you spend time on the ones that are just nice to have. A guest who cannot find the address will not care how pretty your hero photo is.
Step 2: Introduce yourselves
Open the Couple section (it is called People for celebrations that are not a wedding). Add a photo, a name, and a short bio for each of you, in every language you have turned on for the event.
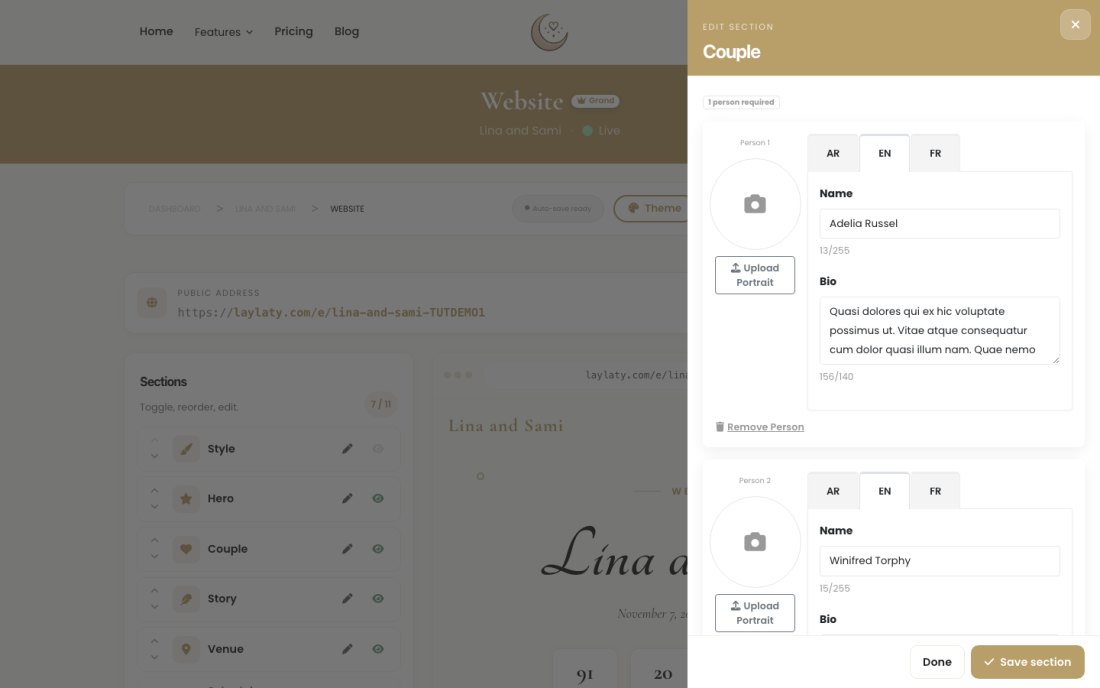
If your celebration is not a wedding, this becomes the People section instead, built the same way, for however many people the moment is about.
Step 3: Tell your story
Open Story to add the milestones that got you here, how you met, the proposal, whatever you want to share. Each milestone gets an icon, a short bit of text, and its own place on a small timeline your guests can scroll through.
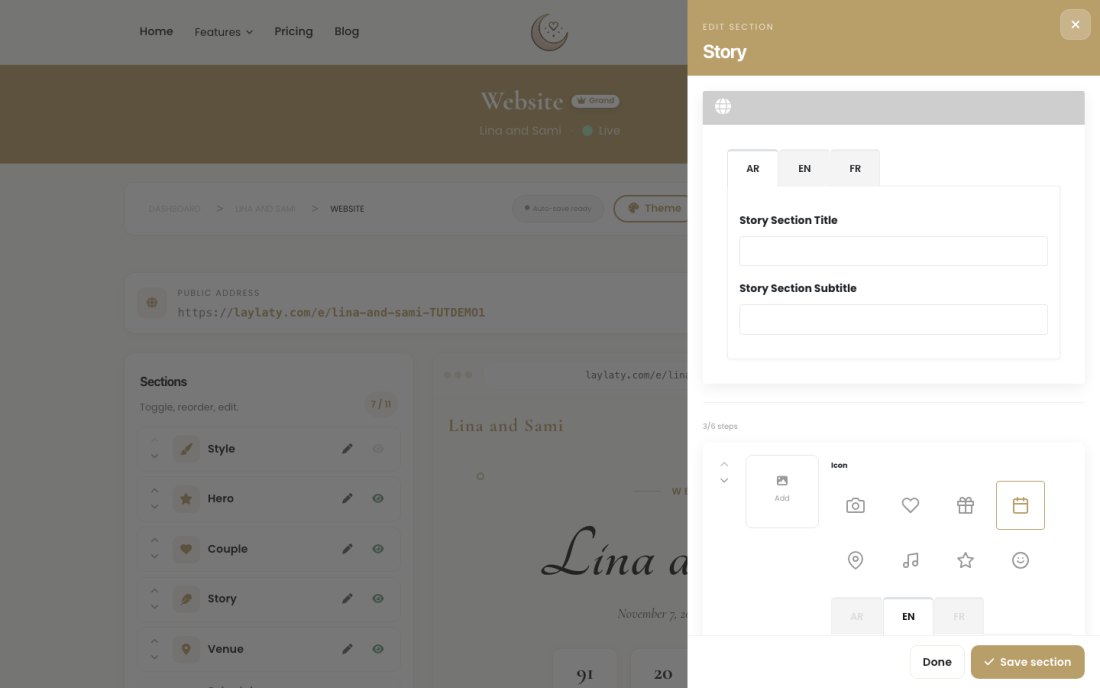
This section is entirely optional, and plenty of couples skip it. If your story is the kind you would happily tell a stranger at the reception, though, this is where it lives permanently, not just in the toast.
Step 4: Answer the questions guests always ask
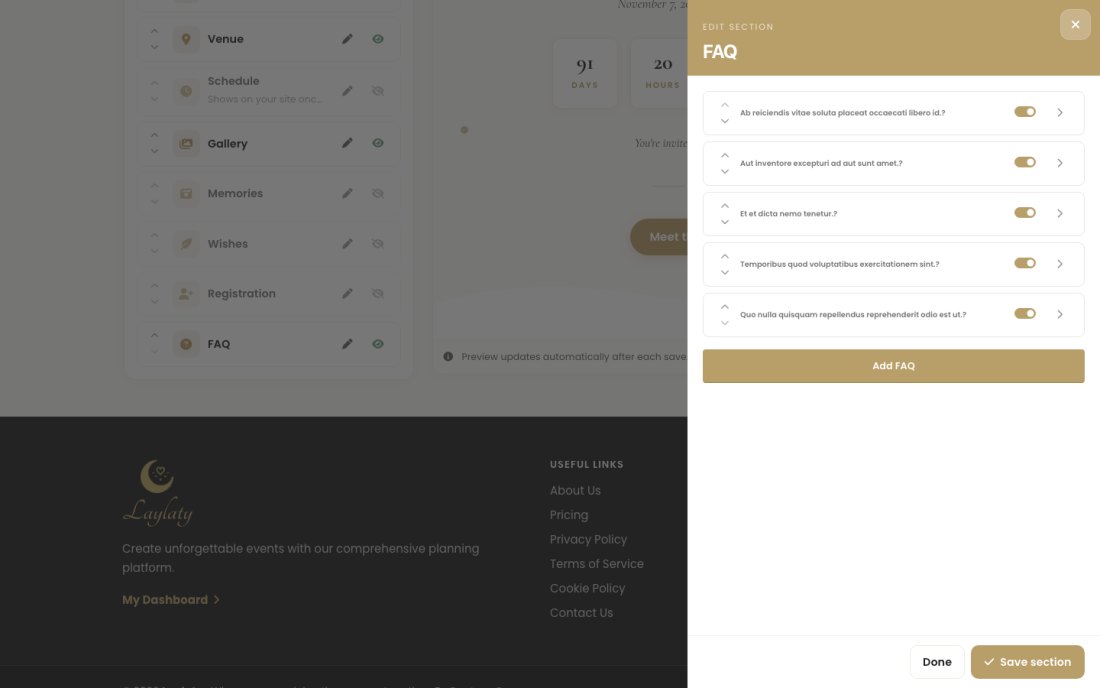
Open FAQ and add the questions you already know are coming: what to wear, whether kids are welcome, where to park, what time the ceremony actually starts. Each one has a question, an answer, and a toggle to show or hide it without deleting your work.
Tip
Write your FAQ from your actual group chats. The question your cousin already asked twice is the one every other guest is quietly wondering too.
Step 5: Make it look like yours
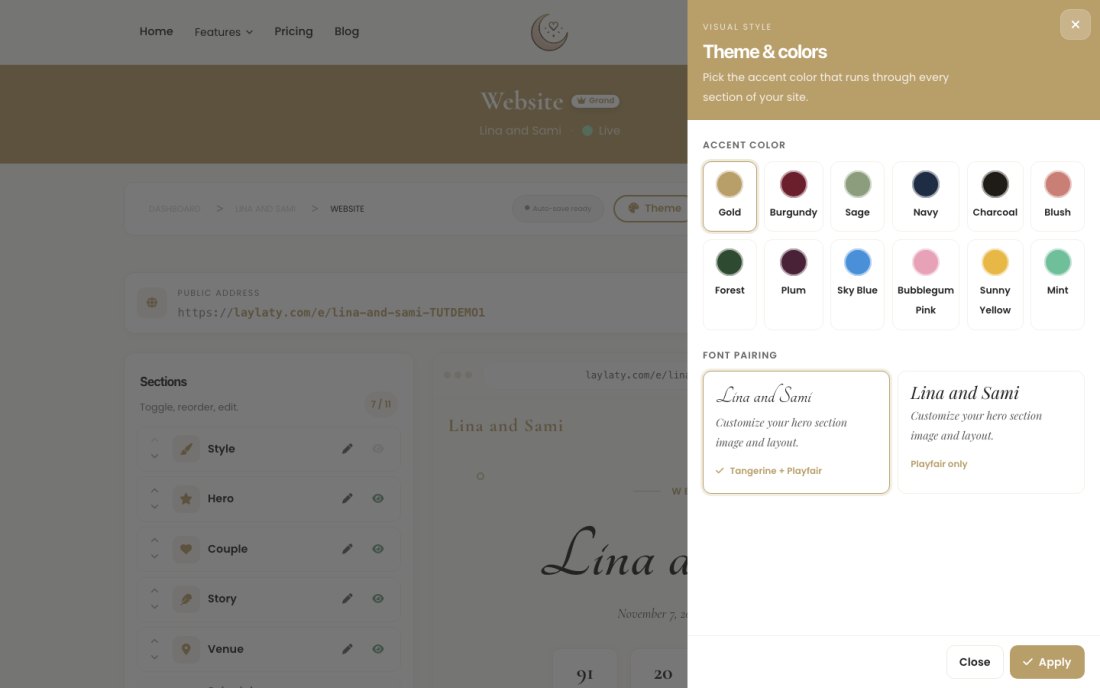
Two dials shape the whole feel of the site. Tap Theme to pick an accent colour, gold, sage, navy, burgundy, and a dozen more, which carries through every section automatically.
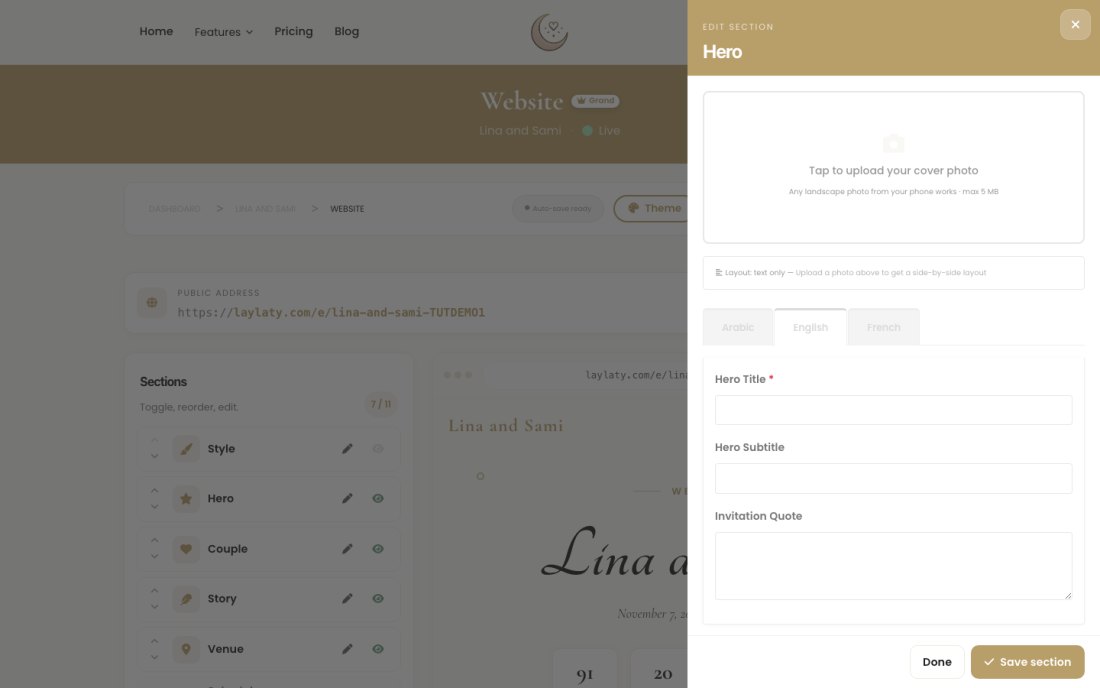
Then open Hero, the very first thing a guest sees, and add your cover photo along with a title, a subtitle, and a short invitation line, again in each language you offer.
A quiet honesty note: any photo you upload here, or anywhere else on the site, counts against your event's storage. It is generous, but it is not unlimited, so save your favourite shot for the hero rather than uploading every option you are torn between.
Step 6: Share the address, and keep it private if you want to
Tap Share & publish. Here you get the web address, a QR code you can print, and one-tap ways to send it, email, WhatsApp, or an embeddable snippet for another site. Flip the switch at the top to take the site live, guests cannot open the address until you do.
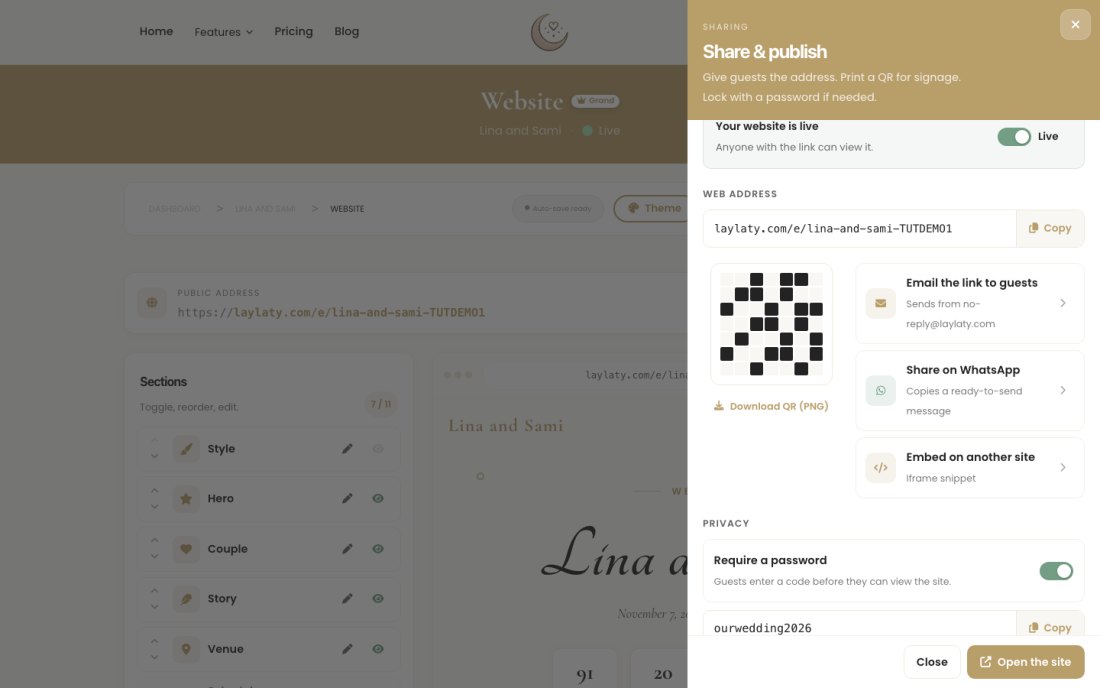
Right below that is Privacy. Turn on Require a password and set a short password, guests enter it once before the site opens to them. Think of it as an access code: it is not meant to stop a determined stranger, it is meant to keep the address off search engines and out of the hands of anyone you did not send it to. Skip it if you would rather keep the site fully open, some couples do, and that is fine too.
Step 7: What your guests see
When they open the link, this is what lands, your names, the countdown, and a clear way into the rest of the site, on their phone just as cleanly as on a laptop.
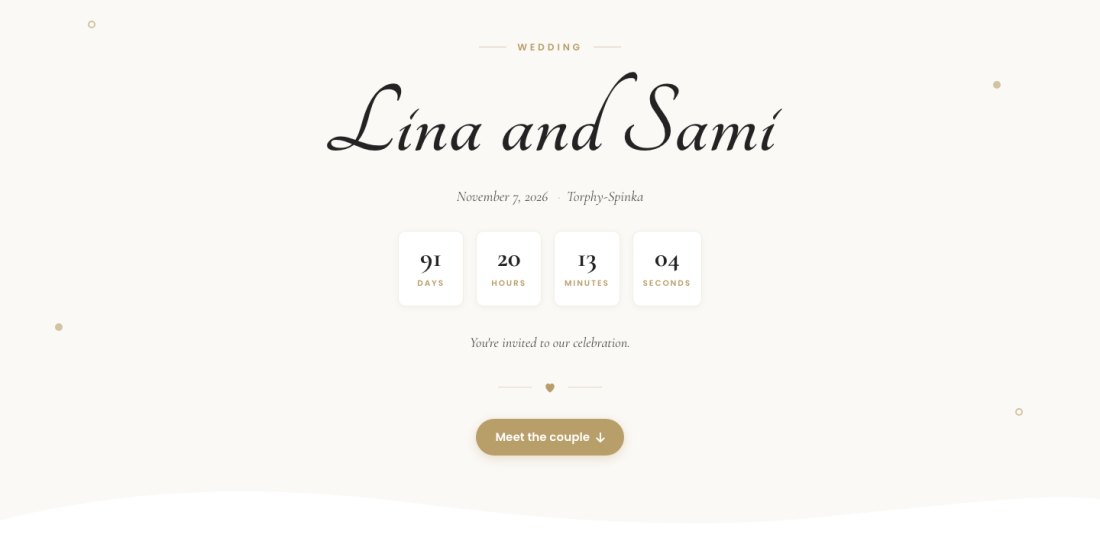
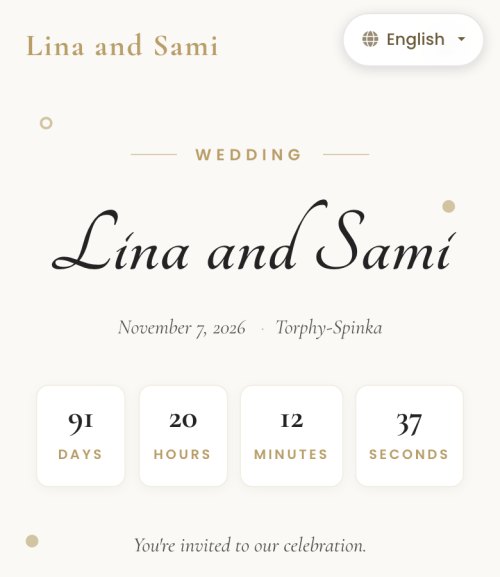
From here they can read your story, meet your people, find the venue, check the FAQ, and RSVP, all without a single extra text from you.
Make it your own
A few dials worth remembering:
- Which sections show at all. Toggle off anything that is not part of your celebration, an empty section never appears to a guest.
- The order of sections, so the story you want told first is the one they see first.
- Your accent colour and hero photo, the two things that make the site feel like yours rather than a template.
- The languages you offer, so people, story, and hero content can each be filled in per language, Arabic laid out right to left.
- The password, on or off, for exactly how private you want the address to be.
Frequently asked questions
Is the wedding website free?
Building and previewing it is free on every plan. Publishing it, so the address actually opens for guests, is included from the Essential plan up, a one-time purchase for the event, not a subscription.
Do I need to be technical to build this?
No. Every section is a short form, a text field here, a photo upload there. There is no code, and nothing to install.
Can guests see the site in their own language?
Yes. People, Story, and Hero content can each be filled in per language, and guests choose theirs from a switcher on the site, including Arabic laid out right to left.
Does the password stop anyone from ever finding the site?
It keeps the address out of search results and off anyone you did not send it to directly. It is privacy, not a vault, so use it if you would rather your guest list stayed the only people who can open the page.
Can I change any of this after I publish?
Yes, any time. The site saves as you go, and you can add, hide, or edit a section whenever you like, even after guests have already visited.
Ready to build yours?
Open your event, tap Website, and start with the section that answers the question you get asked most.